Saturday, January 29, 2011

Soapy Glass Door Fingerpaint

This idea came from my new kindle ebook, First Art.

It spoke of a magical soapy paint that self-cleaned, and suggested that the children paint it directly onto a glass sliding door. Then, because it's made partly from soap, it washes itself off! Magic!

The actual recipe is for 1/2 cup of liquid tempera paint, and 1tsp of liquid soap. However, we only had powdered tempera paint (similar to this http://www.kidsart.com/store/tempset.html) so I just mixed 1Tbsp of tempera powder to 2Tbsp liquid soap. It worked well, but if you can get the liquid stuff that might work better. We got ours from a stationery store here in PNG, and I was pretty impressed to find even that here!  

As you can see, we invited a friend over to play. They both had an outstanding time!


Cleanup was a little bit tricky without a hose...problematic since we live in an apartment with no backyard! So, we employed a trick we learned from the cleaners and used the fire hose from the stairwell! 

I'm sure I looked quite amusing hauling and pulling to get it up the stairs and out onto the balcony. A few blasts with that cleaned the whole thing up. We then hosed the kids off in the shower, then mopped the floors inside (from them traipsing it all into the house) and it was all done! 

Definitely having another mum around was a massive help, probably wouldn't try this solo. 

Judging from the facebook feedback a lot of people think I need my head read for trying this out, but it really wasn't all that bad. Give it a go! 

Saturday, January 15, 2011

Bread dough that's so good, I'd serve it at a dinner party

...if I ever had dinner parties, of course!

More excitingly, this is from a NEW BOOK!

This book, to be precise: "First Art - Art Experiences for Toddlers and Twos" by MaryAnn Kohl

I have downloaded it to my Kindle (which I love love love), and we have been burning through the activities this week.

Anyway, this would be a brilliant activity to do if you'd run out of bread - good enough  to use to make bread rolls for lunch - YUM! This was also helped by the fact that the beautiful year-round tropical humidity in Pt Moresby means that bread rises beautifully if left outside on the balcony. OK, here it is...

Ingredients
  • 1 cup water
  • 1 tsp (7g) sugar
  • 1 T (20g) yeast
  • 2 cups flour
  • 1 tsp salt
  • 1 T oil
With your child's help, mix the water, sugar and yeast in a bowl until the yeast softens (2-3 mins) ... I have no idea what she means by that, but we did it anyway. Then add half the flour, stirring vigorously with a wooden spoon. Biscuit loved getting to "mix mix mix!". Add the oil, salt and the rest of the flour.

Here you're supposed to pour it out onto a floured board and knead the dough. We cheated and chucked it in the food processor with the dough hook attachment. Anyway, the official directive is to "knead for about 5 minutes until the dough is smooth, elastic and satiny. It should bounce back if a finger is poked into it".

Then put the dough into an oiled bowl, cover it with plastic wrap and a clean teatowel and leave it to rise in a warm area for about 45 minutes. (Ours was GINORMOUS!)

Punch it down and work into a smooth ball, then play with it as you would playdough...
You can make marks in the dough with forks, skewers, knives etc...

At around this time, you can preheat the oven to 200C (400F)

Biscuit and Mary... we covered her usual activity table with a clean tablecloth...
Biscuit helping decorate Mummy's shapes...
Biscuit's sculpture

 Now place your sculptures on a baking tray in the lower part of the oven and bake for 15-20 mins (larger sculptures may take longer!).

Fresh out of the oven.  Smells delicious!
Picnic time!!
Delicious hot with butter and jam!
 This really was the activity that kept on giving. Firstly, we had fun mixing the dough, watching it rise up. Then we got to play with the dough, have fun making shapes, squeezing, squishing, mashing it with forks. Then we got to watch the bread rise while it was baking in the oven, and smell delicious dough smells. Finally, we got to eat our little hot rolls for morning tea with yummy butter and jam.

Brilliant. Just brilliant!

Soapy Shower Fingerpaint

This one is again from 350+ Free Activities For Toddlers.

We actually did this activity late last year, and the pics are all from then.

Ingredients:
1/2 cup pure soap flakes (we used Lux)
3/4 cup water
electric mixer (or wire whisk)
Food colouring (optional)
Paintbrush
Spray bottle or shower hose

Method:
Use an electric mixer to mix the soap flakes, water and food colouring together until it's the texture of shaving cream. Then sit them in the bath or shower and let them go  nuts, painting and then squirting the foam off the walls.

CAUTION: You may want to investigate whether or not the food colouring will stain the grout! We only used very little pink, and it was fine, but you could hardly tell it was coloured.

This was great fun! A fantastic way to cool down on a hot Port Moresby afternoon, after running around outside!


Before....
.....after whipping it (whip it good)

 So as you can see, lots of fun was had. She stayed there quite happily for about 45 minutes painting the tiles, her bath book, herself....

Great activity!

Sunday, January 9, 2011

Keeping Biscuit Busy Out and About - Part 1

Hello! Sorry for the absence of late! We've been back in Australia, catching up with family and friends.

Which leads into the theme of this post.

When we're out, say having lunch or a coffee at a restaurant, Biscuit wants to be marauding all over the place and causing general havoc.

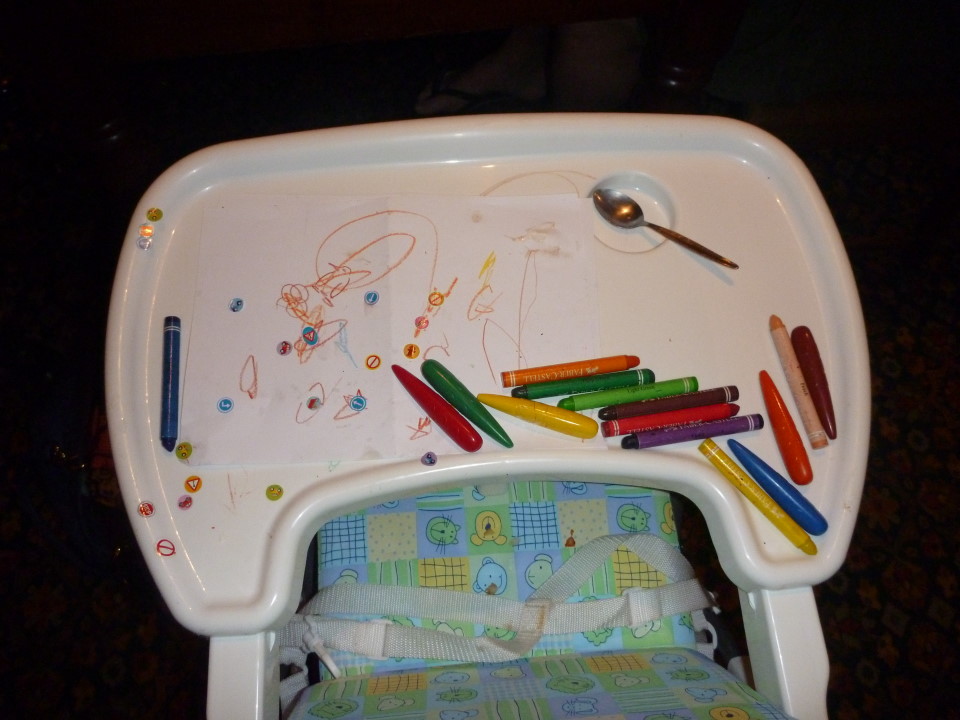
My friend Lou put me on to the wonders of stickers...

We bought a few stickerbooks at the $2 shop, each had a few hundred stickers of varying shapes, sizes and themes (fish, trucks, planes, faces, flowers).

Then when we go out we bring a notepad, some crayons (not as messy as textas) and all our stickers.
Biscuit can't quite get the stickers off the page by herself yet, so we peel them off and line them up on the highchair or the table's edge.

Good times with stickers
Biscuit-eye view

Well behaved Biscuit at breakfast
*I may note that these stickers were the very last ones left in the book, and hence are not of the most entertaining variety. More were purchased following this breakfast...

So, through this simple magic we had many enjoyable get-togethers over the christmas/ new year break.

This is definitely not rocket science, but I'm not much of a planner, so it is at times shocking to me how a little planning like this can prevent chaos!

Monday, December 6, 2010

A few good links...

Hi! Sorry, I've been terrible at keeping this updated! But we have been doing stuff!
I promise I'll get around to it soon.

In the meantime, here's a great link on children's playspaces.

http://www.threesisterstoys.com/t-playspace.aspx

Some of my favourite ideas are...

"Establish a "New & Exciting Box" - If you notice your child isn't playing with a certain toy, put it away in a box. If you child is given a gift you don't particularly want them to play with on a regular basis, put it in this box as well. Store the box in a closet. Pull it out on those days when your child has run out of play ideas, rainy days, or days you feel like you're losing your sanity! These "new and exciting" toys may do the trick!"

"Create Theme Areas - Think back to the "centers" of your own kindergarten classroom. You can also do this at home! Some examples are a housekeeping area with a play kitchen and/or ironing board, an art area with an easel, apron and paints. How about a story corner complete with a bean bag and your child's favorite books?"

Another website I just found had some good tips... http://sewliberated.typepad.com/sew_liberated/2010/11/a-different-kind-of-black-friday-low-cost-big-gifts-for-children.html

"Organize a spectacular dress-up area. Keep your eyes peeled for fun hats, shoes and outfits during thrifting excursions, or make your own. Dedicate a space for dress up in your home - set up one of those cheap wall mirrors next to a peg shelf. Add ribbon loops to all shirts and pants so they can be hung from the peg shelf, assuring that they are easily accessible to children and don't get lost in a bottomless toy chest. Place shoes and accessories in bins below the peg shelf. Remember to rotate the items on occasion to maintain the child's interest."
(that link to the spectacular dress up area also has some great ideas!)

Just some stuff to think about.... :)

Friday, October 29, 2010

Slip Slop Slap Cake

Again, from 350+ Free Activities for Toddlers

Named after the famous Aussie sunsmart campaign of the same name (?why), this was touted as "a cake even very young children can proudly say I made it all by myself!". Hmmmm...

Ingredients:
  • 440g (15.5oz) can crushed pineapple
  • 150g (5oz) frozen or fresh berries
  • butter cake, packet mix
Method:
In a 20cm x 30cm tin, pour in the entire can of crushed pineapple, juice and all. I'm assuming this is the slop. Then slip, or possibly slap all the berries over the top in a layer. Finally, make the packet cake according to the directions on the box, and you should [insert remaining verb here] the cake mix over the pineapple and berry layer. Then, bake according to the cake directions. Mine said 45 minutes at 180C.


I'm going to just come right out and say that this was a tremendous success as far as Biscuit was concerned.

First, we made the butter cake. It needed 4 EGGS! Is that normal? Who knows!!


It's never a good idea to lick raw cake batter containing eggs, and even less of a good idea to do so in a developing country where you're even more at risk of salmonella-ey type things. But try telling that to a 16 month old!


After unintentionally trying to dismount the chair backwards and to the right, Biscuit was restabilised and set about pouring the pineapple into the bottom of the tin*.


We smoothed it all out as a layer after this...


We couldn't be bothered with the berries. Ours is just a slop/slap cake.


Terrifying selfie.... Also, please note cake mix on my head, not large festering boil...


Uh oh!!! Only now do I realise that because we used a silicon pan rather than metal, it did not get hot enough to caramelise the pineapple. Instead we have very hot pineapple on top of a cake.


Still tastes good though!


We also gave some to our haus meri and to our security guard. The security guard was so impressed he now helps us in and out of the car and addresses me as "my sister". Woah, someone likes cake!

5 stars.

Wednesday, October 27, 2010

Ice Cube Melts

This idea is also from 350+ Free Activities for Toddlers

Basically, you make ice cubes in 3 colours: red, blue and yellow, using food colouring in 3 separate bowls of water. Then you grab 3 resealable plastic bags, and put
  • 1 red and 1 blue in one bag
  • 1 red and 1 yellow in one bag
  • 1 yellow and 1 blue in one bag
That's pretty much the whole thing. Then you give the bags to your toddler and let them play with the ice cubes and watch the colours merge as the ice cubes melt.

I think perhaps we timed this one poorly....

You can see here, I have just placed the bags in front of her on the highchair tray, immediately after lunch.
She is immediately trying to extricate herself from the chair...


Here is my husband bowing to pressure and removing her from the highchair, icecubes entirely ignored.


I think I have to give this 2 stars. I'm sure it would have been a better activity, but timing was definitely off in this case!

I enjoyed playing with them, anyway.